Making a Simple 14th Century Purse

 Meisterinde Amie Sparrow

Introduction

The article will teach you how to make a simple 14th century purse based on illuminations from medieval manuscripts produced in Europe in the 1300s. One of the most famous examples of purses in illumination is the German manuscript Codex Manesse, c. 1300-1340, folio 64r. 

A drawn image of a blonde woman in 14th century German dress, shopping with a blonde gentleman in a blue cloak shopping for purses and belts.
Codex Manesse, c. 1300-1340, folio 64r

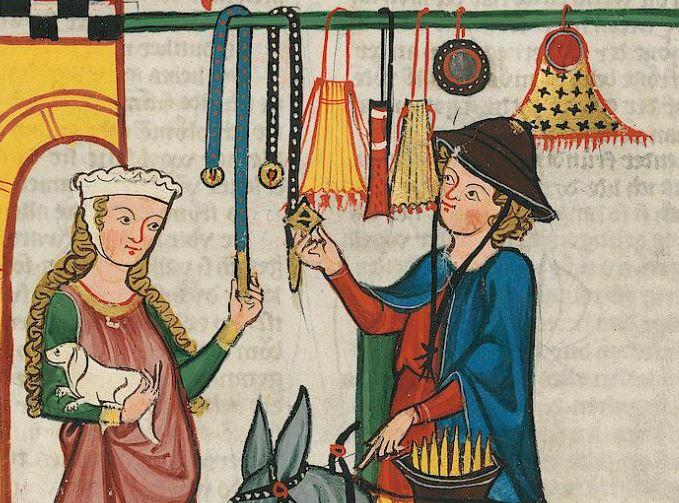
The woman shopping in this image is a high status woman of the elite or ruling class. A poet is flirting with her and perhaps promising to buy her something. Since there are no 14th century romantic German poets hanging around in 2022 waiting to buy purses for any of us these days, I’m going to teach you how to make your own purse.

Important Tips!

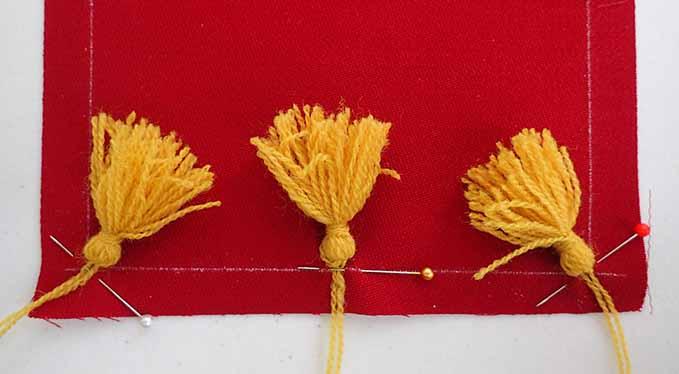
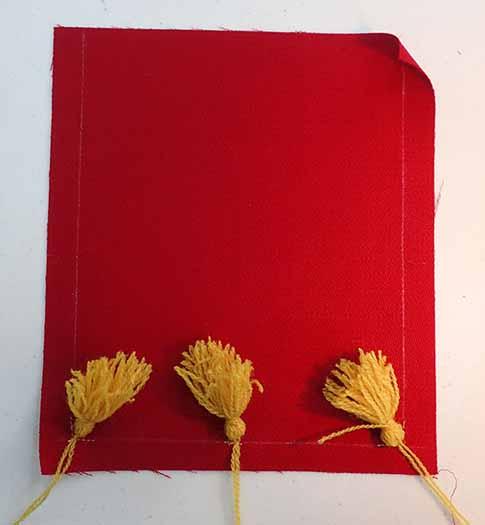
Tip 1: If you are putting a design on the bag, adjust the length of the bag accordingly so that when the drawstrings are pulled shut, the design is not squeezed at the top. On the purple bag below, I didn’t account for the design and as a result, it looks squashed when the bag is closed. I was very unhappy after I’d finished hours of embroidery on both the front and back only to realize that I didn’t take the “squash factor” into account.

On the black bag below, I added an extra inch at the top so that the design on the bag is fully visible even when the bag is shut. 


Amie Sparrow’s Heraldic Purse

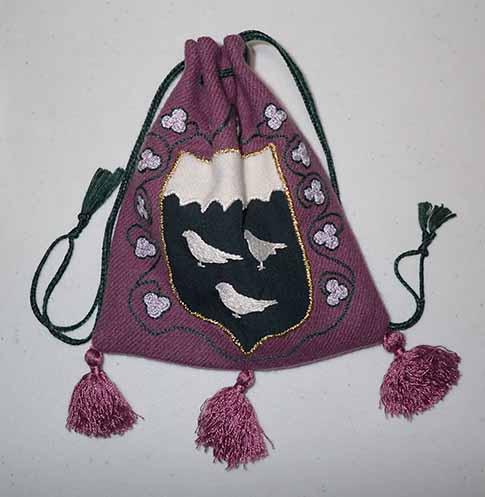
Example of Heraldry Too Close to Drawstrings

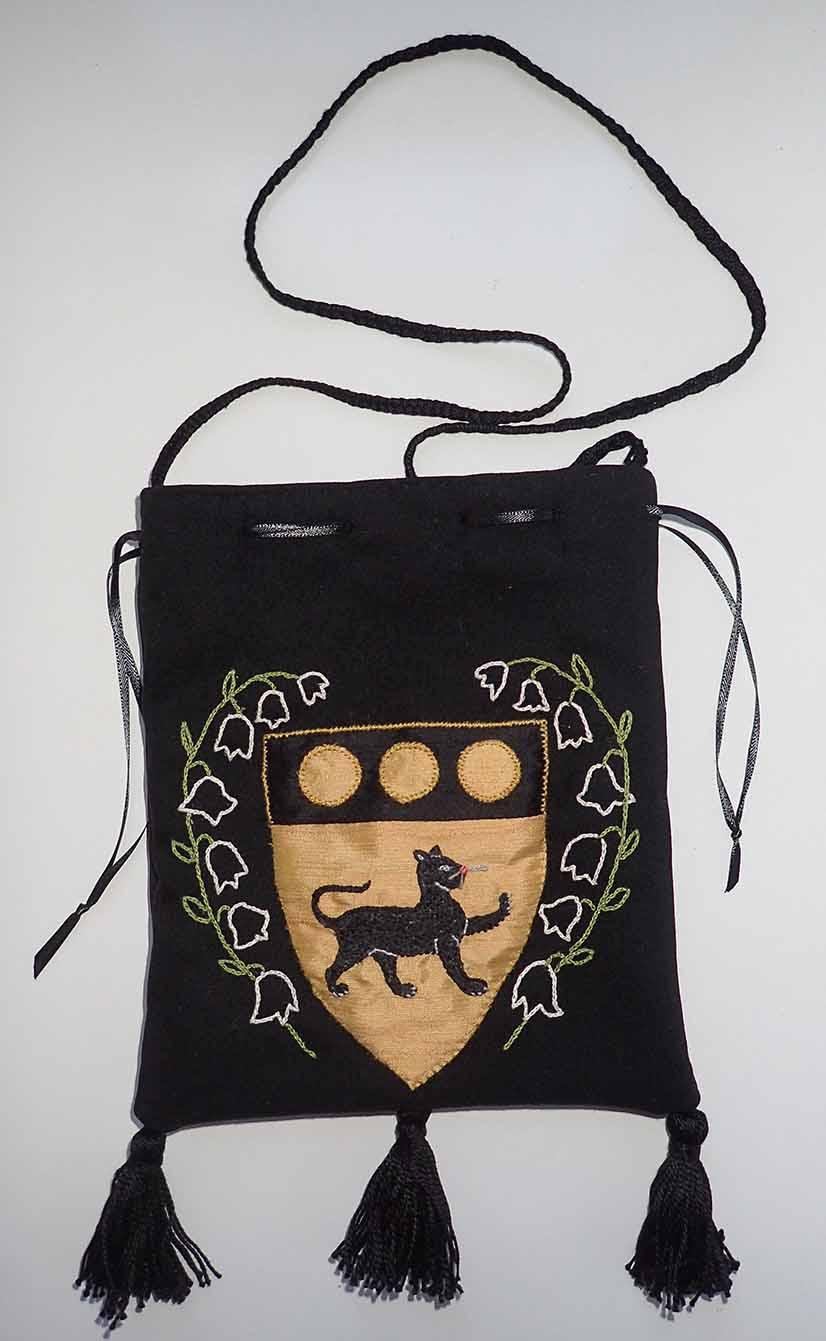
Cynthia Anne of Silver Lakes’ Heraldic Purse

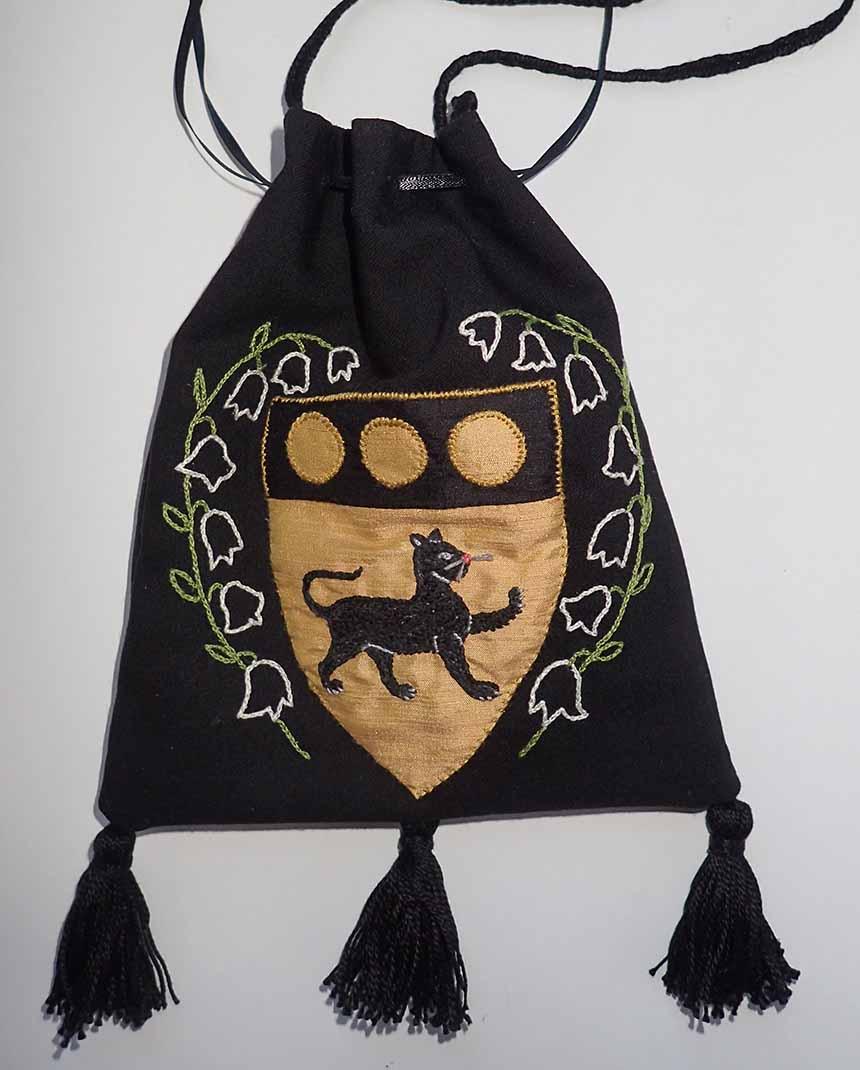
Example of Heraldry With Room for Drawstrings

My recommendation is that you try out the size of the bag paired with your design on a piece of felt. You can draw anything as a stand-in for your embroidery. Just make sure it takes up the same amount of space. If you pull those drawstrings tight and you can still see your design, you’re good to go.

Tip 2: Embroider or applique your design BEFORE you cut out the pieces of your bag. This sounds like common sense, right? It’s not. I have forgotten that tip from time to time and you may forget as well. Why do you add your design first? See Tip 3.

Tip 3: Even though you will have chalked out the size of your purse on a piece of fabric before you do your embroidery or applique, anything you do to add a design will inevitably make that piece of fabric smaller by ¼ x ½” because the tightness of your stitches will draw up the fabric. So, AFTER you add your design to your purse fabric, re-measure your purse pieces before you cut. 

Materials

I recommend using woven wool for the outer shell of the purse and lightweight linen for the interior of the purse. Other materials are more easily substituted for the drawstrings and tassels. Here’s the recipe:

  • (2) 7” x 8” pieces of woven wool (not felted). Use a larger size 8” x 9” if you’re going to include an embroidered or applique design.
  • (2) 7” x 8” pieces of lightweight (preferably handkerchief) linen. Use a larger size 8” x 9” if you’re going to include an embroidered or applique design on the outer shell.
  • 3 skeins of cotton or silk embroidery floss for draw strings and purse cord (or you can use purchased cord or ribbon)
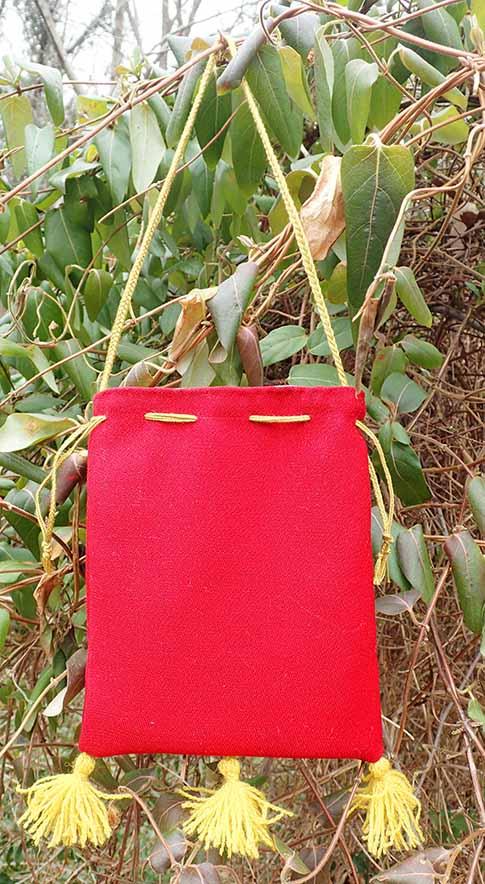
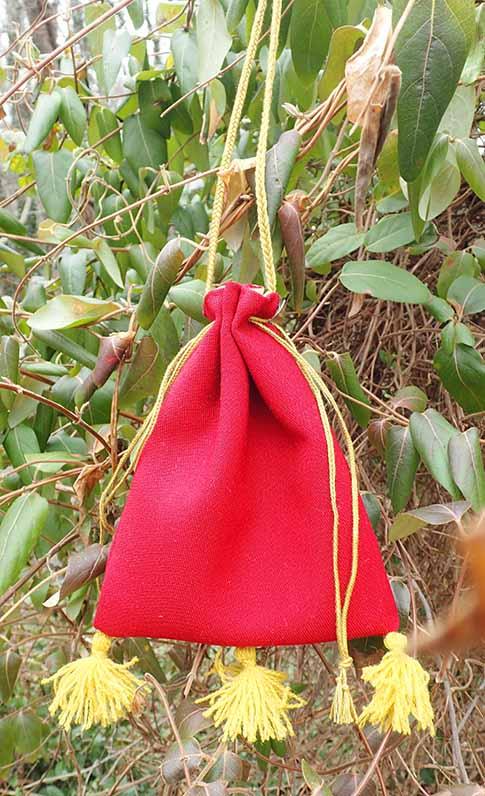
  • 1 skein of wool or cotton or silk embroidery floss for tassels (or you can purchase premade tassels). Tassels are optional but most people want them.
Two different types of golden yellow embroidery floss, two skeins of cotton DMC and one of wool.
Examples of Cotton and Wool Embroidery Floss

Prepare or acquire all the pieces before you begin any construction.

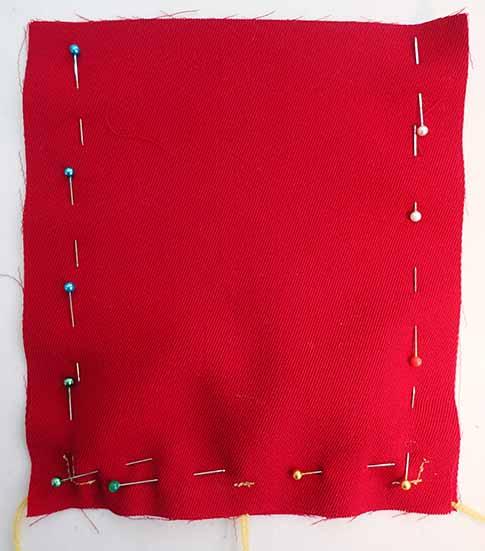
Cut the Fabric Pieces


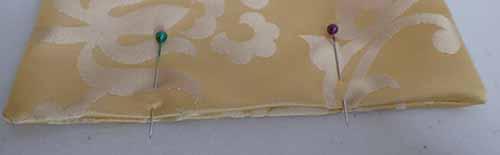
Cut wool fabric for the outside of the purse.Cut lining fabric for the inside of the purse.
For the outside of the purse, cut two pieces of woven wool 7” x 8”. Please don’t use felted wool. It is too bulky for the drawstrings.
For the lining, cut two pieces of lightweight linen 7” x 8”.
Note: This example is made with high contrast fabrics so it is easier for you to see. The lining is made with silk, which I do not recommend because silk is very tightly woven compared to linen.

Make or Buy the Tassels

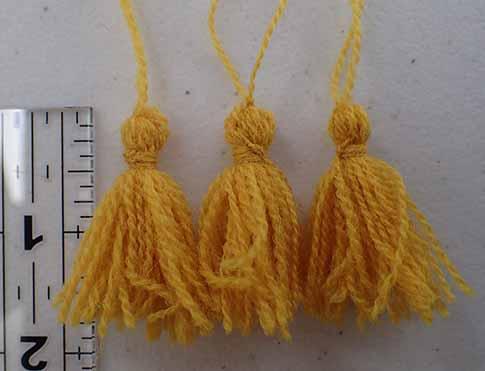
Teaching you how to make tassels is outside the scope of this article however, there are many tutorials available on YouTube.
To be historically accurate, the tassels should be wool (as the sample tassels on the left) or silk.
If you don’t care about historical accuracy, cotton DMC floss works, too.
https://www.youtube.com/watch?v=THGfiIFnhjI
Caption: Wool Tassels

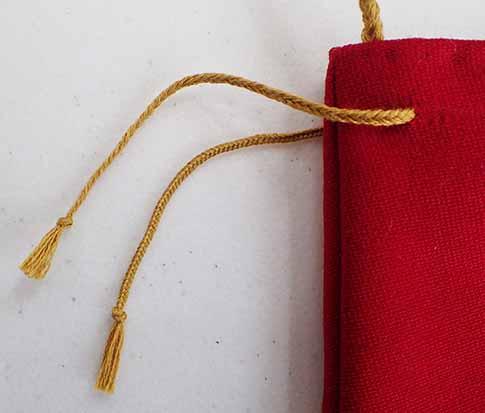
Make or Buy the Drawstrings and Belt-loop Cord

Teaching you how to make fingerloop cords is outside the scope of this article however, there are several tutorials available on YouTube. If you don’t care about fingerloop braiding, then purchased ribbon is perfectly acceptable for SCA purposes. For the drawstrings, you’ll need 2 pieces of 20” ribbon, about 1⁄4” wide. For the belt-oop cord, you’ll need 20” of wider ribbon (1/2”). Make the belt-loop cord to your preference. 

If you’re not interested in hanging the purse off your belt, then don’t add a belt-loop cord at all.

Three 19" pieces of golden yellow cord, one much heavier than the other two, for use as drawstrings and as belt-loop cord. All are knotted at both ends.
Fingerloop Braids for Belt-loop Cord (top) and Drawstrings (Bottom) 

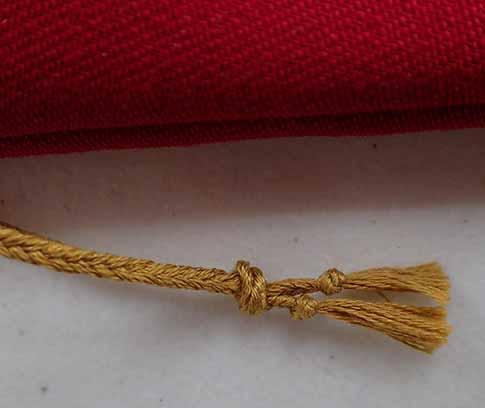
For reference, the woven thick cord is made of 5 lengths of 48” long 6-stranded DMC. I used a 5-cord fingerloop woven method.

The thin drawstrings are made of 5 lengths of 48” long 2-strands DMC. Again, I used a 5-cord fingerloop woven method.

Here’s a link to one of the fingerloop braiding tutorials: https://www.youtube.com/watch?v=GQpEcGfv-rY
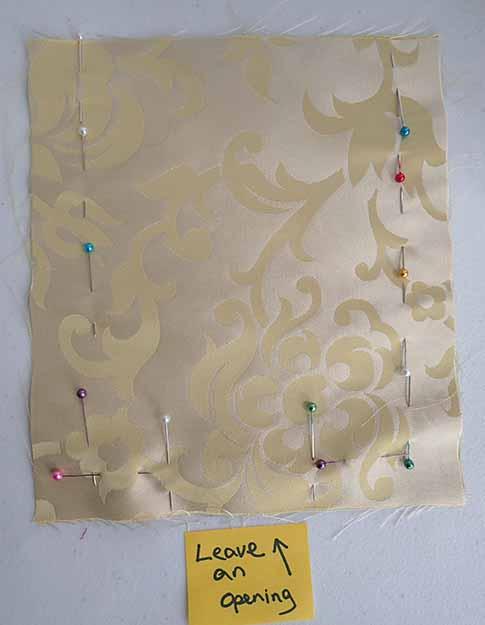
Construction

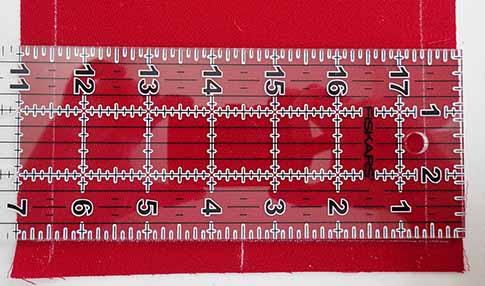
Note: All the photos below assume that your bag is 7” x 8”. If you’re making a larger (or smaller) bag, adjust your measurements accordingly. All construction assumes a ½” seam allowance.

Make the Outer Shell

A piece of red wool fabric with a clear ruler on top. Two thin white lines indicate 1/2" from each edge for a seam allowance.
Mark ½” seam allowance around one piece of the outer shell. Also mark the midpoint of the lower edge (this is the 7” short side. 
Three golden yellow wool tassels, pinned at each corner and at the center or the edge of a square piece of red wool fabric.
Using those guidelines, pin the three tassels on the short edge on one piece of outer shell. The body of the tassels is facing towards the purse body.
A wide shot of a piece of red wool fabric with three golden yellow tassels pinned at the bottom edge. The left, bottom, and right edges have a thin white line marking a 1/2" seam allowance.
Baste in place. 
A piece of red wool fabric pinned to the previously referenced fabric with tassels before sewing in place for a bag.
With the tassels pulled toward the body of the purse, pin the second of the outer shell to the first piece. Pin on three sides.
Two pieces of red wool fabric sewn together with the corners clipped at approximately a 45 degree angle with three tassel cords visible along the bottom edge.
Sew with ½” seam on the two long sides and the short side containing the tassels. You can use the basting marks to make sure you don’t run over the tassel bodies. If you’re going to use a sewing machine, use a presser foot so you can sew right up to the edge of the tassel.

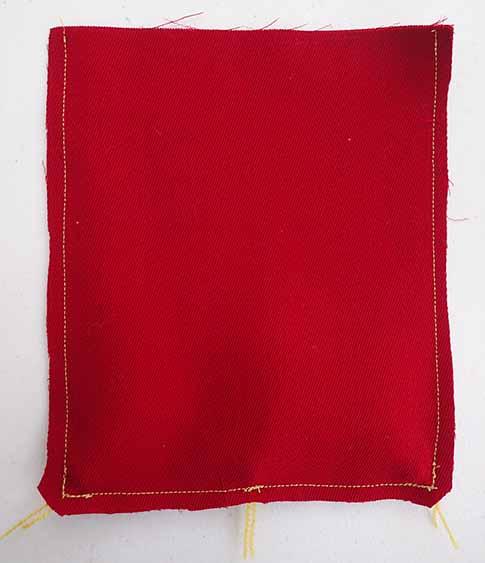
I’ve used a contrasting thread so you can see the seam. If this example was not made for an article, I would have used a matching thread.
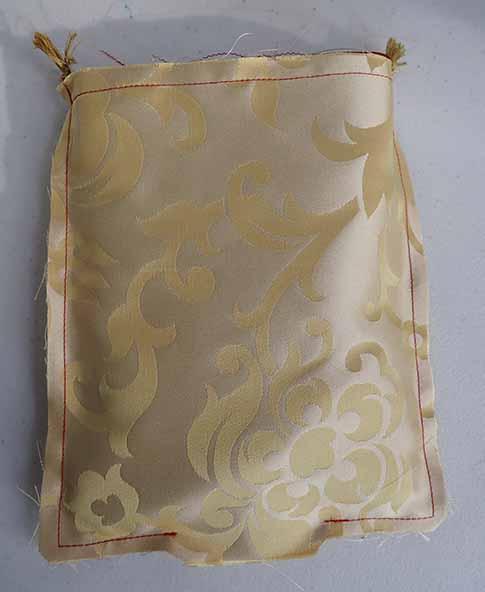
The outer layer of a red wool bad, top edge unfinished, with three gold tassels on the bottom.
Trim the seams and turn the purse right-side out. 
The other layer of a red wool bag with three gold tassels, top edge unfinished, with a matching gold cord secured on the left and right sides for hanging on a belt.
Baste the belt-loop cord to either side of the outer shell top at the side seams.

Sew the Lining

Two pieces of a cream silk fabric with a floral design pinned together with an opening on the bottom edge. A sticky note has an arrow pointing at the opening an the note "leave an opening" below the fabric.
Pin the two lining pieces together on three sides, two of the long sides and one short side. Leave an opening at the center of the short side. You will use the opening to pull the outer shell through.
Cream floral silk fabric sewn together with an opening at the bottom. All the seam allowances except for at this opening have been trimmed, and the corners all cut at a 45 degree angle.
Sew the two pieces together along the two long sides and partially on the short side.
Trim the seam allowances and clip the corners to reduce bulk. Do not trim back the seam allowance directly over the opening. You’ll need that extra fabric later.

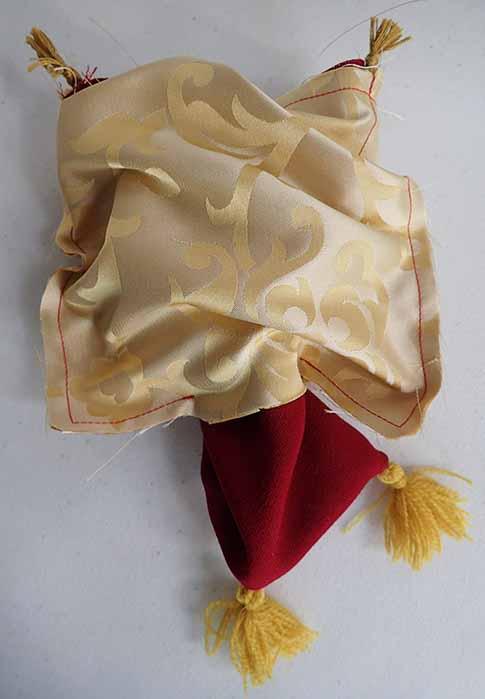
Sew the Lining to the Outer Shell

The red outer layer of the bag, cord and one tassel visible, being inserted into the cream inner layer.
Insert the outer shell of the bag into the lining, right sides to right sides.
The cream inner layer with its bottom opening is visible and there is now a seam at the top where the outer layer has been attached to the inner.
With right sides together, pin the top of the outer shell to the top of the lining. Make sure the belt-loop cord is between the outer shell and the lining. Sew all the way around the top openings.

Pull the Outer Shell Through

The red outer layer of the bag is pulled through the cream silk inner layer through the hole left at the opening. The ends of the cord are visible at the top, while two of the tassels are visible at the bottom.
Pull the outer shell of the purse through the opening in the lining center bottom.
Both layers of the bag are visible sewn together, with the cream silk layer at the top of the image and the red wool layer with its cord and tassels at the bottom. The corners of both layers have been pushed out with a thin tool to appear very squared off.
Poke a chopstick or a thin ruler into the bottom corners, making sure that they are fully popped out and squared off.

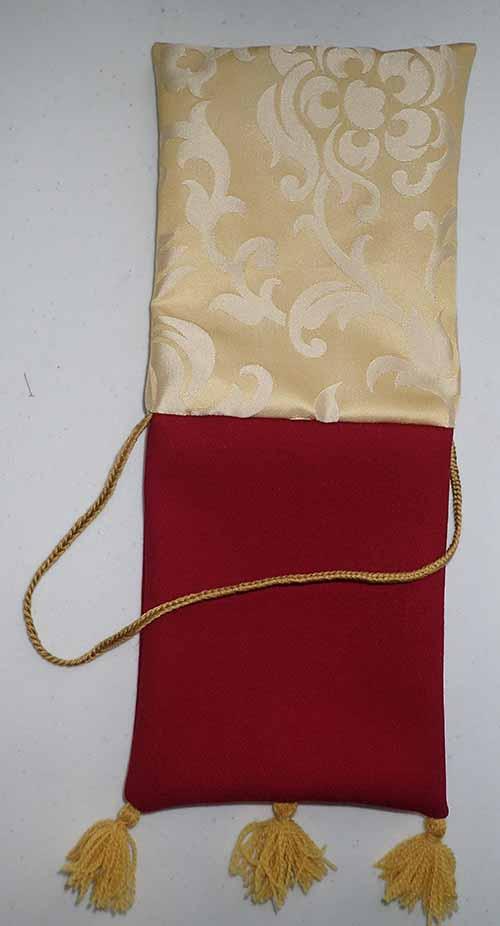
Close the Opening in the Lining

Two pins hold the opening to the cream silk linking in place with the unfinished edge folded in.
Pin the opening in the lining closed.
A whip stitch is visible against the cream silk lining, closing the opening to the bottom layer of the bag.
Whip stitch the opening shut.
The cream silk lining has been pushed into the red wool outer layer. The edges of the red outer layer are visible, as is the cord and two of the gold tassels.
Push the lining into the bag.
The bag has been turned up right and the edge between the cream silk linking and the red wool outer layer has been made sharper by pressing with fingers and then pinning in place. The bad is being held up by its gold cord against a sewing machine.
Finger press the top edges of the purse together so that the seam is nearly visible. Pin in place.
The top edge of the bag where the cream and red layers meet has been stitched down to hold the two layers in place and prevent shifting and curling.
Using tiny stitches, baste the top edge together to hold it into place, preventing it from curling back in upon itself. 

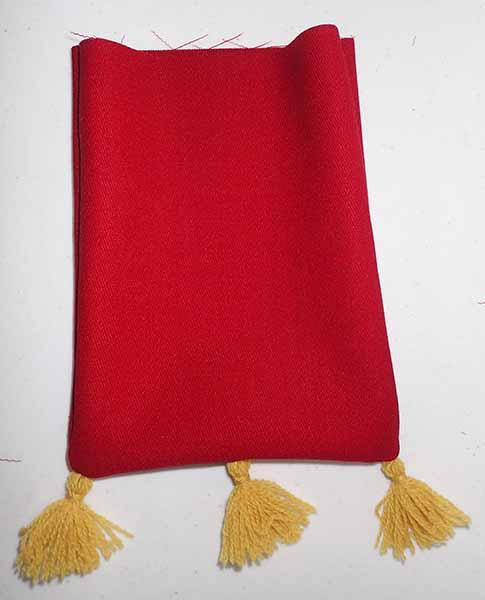
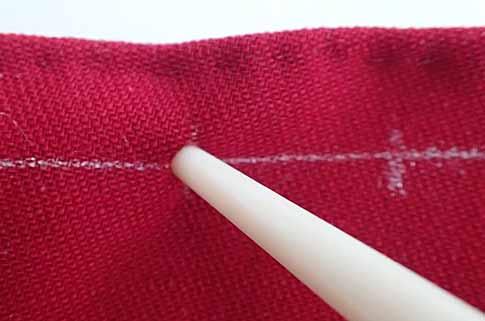
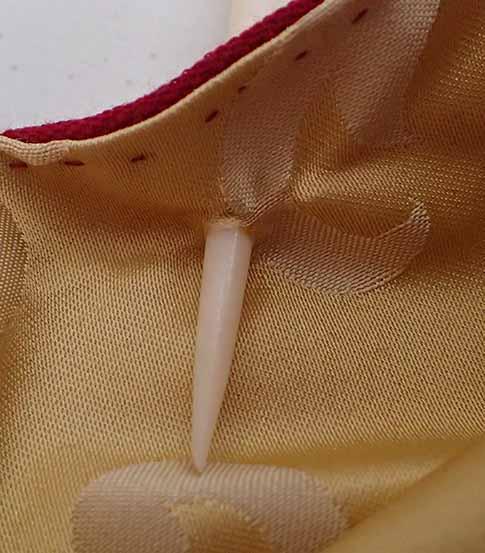
Make Drawstring Holes

The bag is laid flat on a table and a white bone awl is laid out on top of it. One line spanning the width of the bag is marked in thin chalk 1/2" from the top and there are 6 lines marking spots for drawstring holes at regular intervals, drawn perpendicular to the first line.
Mark 12 drawstring holes ½” down from top.

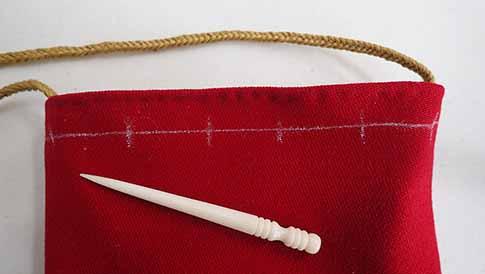
Historically accurate drawstring holes are not finished on bags. An awl is worked through the fabric and the drawstrings are threaded through. 

Ten years ago, I didn’t know any better and I made eyelets. This is wrong.
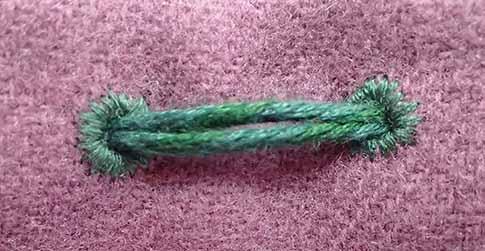
Incorrect drawstring hole, with finished eyelets
Since then I’ve learned the awl method. See the threads pushed apart and not cut. This is correct.

Historically accurate drawstring hole
A close up shot of the bone awl pierceing the red wool layer at one of the tick marks indicating a drawstring hole. One of the additional tick marks is visible to the right of the awl. Very faint stitches can be seen on the top edge.
Use an awl to work a hole in the fabric for each drawstring hole. Use a gentle twisting motion to work the awl through the threads without damaging them. Be gentle! It’s easy to snap a thread. Woven wool and linen are much easier to work with than tightly woven silk.
A close up shot of the bone awl that has pierced through both layers of fabric, with the point visible from the cream silk edge.
Awl on the Inside of the Bag
A wood bodkin is laced with the gold drawstring cords and is pilling one cord from the red side into the bag through the hole just made by the awl.
Thread a drawstring cord through each hole as it is made.

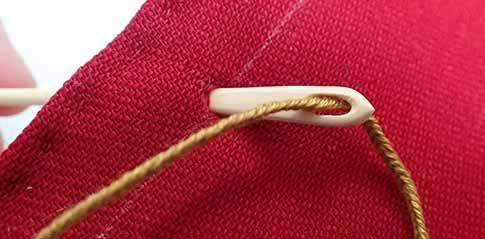
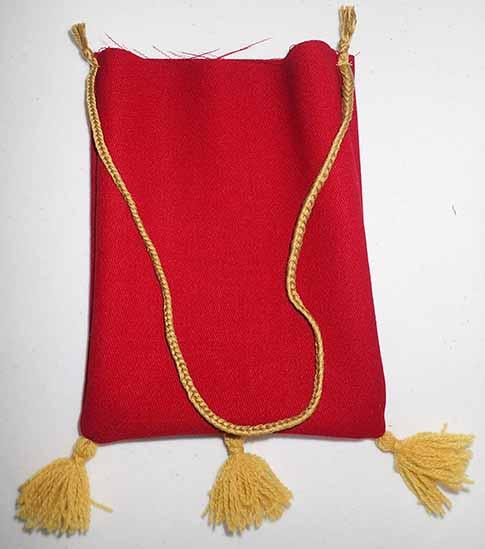
Once you have both ends of the cord threaded through the holes, tie the ends together so that they don’t slip back out of the drawstring holes. This is especially important if you’re using ribbon. Make sure to thread that second drawstring using the same holes, you’re just coming in from the other side of the purse.

The two gold drawstring threads, knots and excess thread visible to the left hand side, pulled through the final holes on each side of the red bag.
Drawstrings completely threaded,
The two gold drawstrings knotted together in one larger knot above the small knots preventing fraying at the bottom of each drawstring. Side edge of the red bag is visible.
Drawstrings tied together.

And you’re done!

The completed red bag hanging off of a garden plant by its gold thread. Drawstrings are pulled on both sides and all three tassels hang at the bottom.
Completed bad, drawstrings drawn

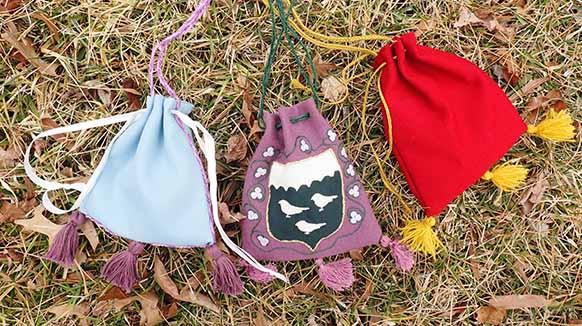
Here are some samples of the bags that I have made. In the photo below, there are 3 wool bags. The center bag is the oldest. The tassels on each bag are made from different materials. The blue bag’s tassels are cotton DMC. The purple bag has silk tassels and the red bag has wool tassels. I think that silk performs the best.

Three drawstring bags on the grass. On the left is a sky blue drawstring bag with three purple tassels, a purple belt cord, and white fabric drawstrings. The middle bag is a purple drawstring bag with lighter purple tassels, and a forest green cord. On the front is a shield with a white space at the top and black at the bottom. The black space has regularly occurring humps giving the white a cloud like appearance and there are three white birds on the black. Around the shield is a wreath of white flowers on a green vine, each with three petals. On the right hand side is the red and gold bag made for this article.
Samples of finished purses.

Bibliography

Handout online:

14th-15th century embroidery patterns charted by Master Richard Wymarc: https://www.wymarc.com/

Image Reference: Digital Manesse Codex. University of Heidelberg Library. https://digi.ub.uni-heidelberg.de/diglit/cpg848/0123

Leave a Reply

Your email address will not be published. Required fields are marked *